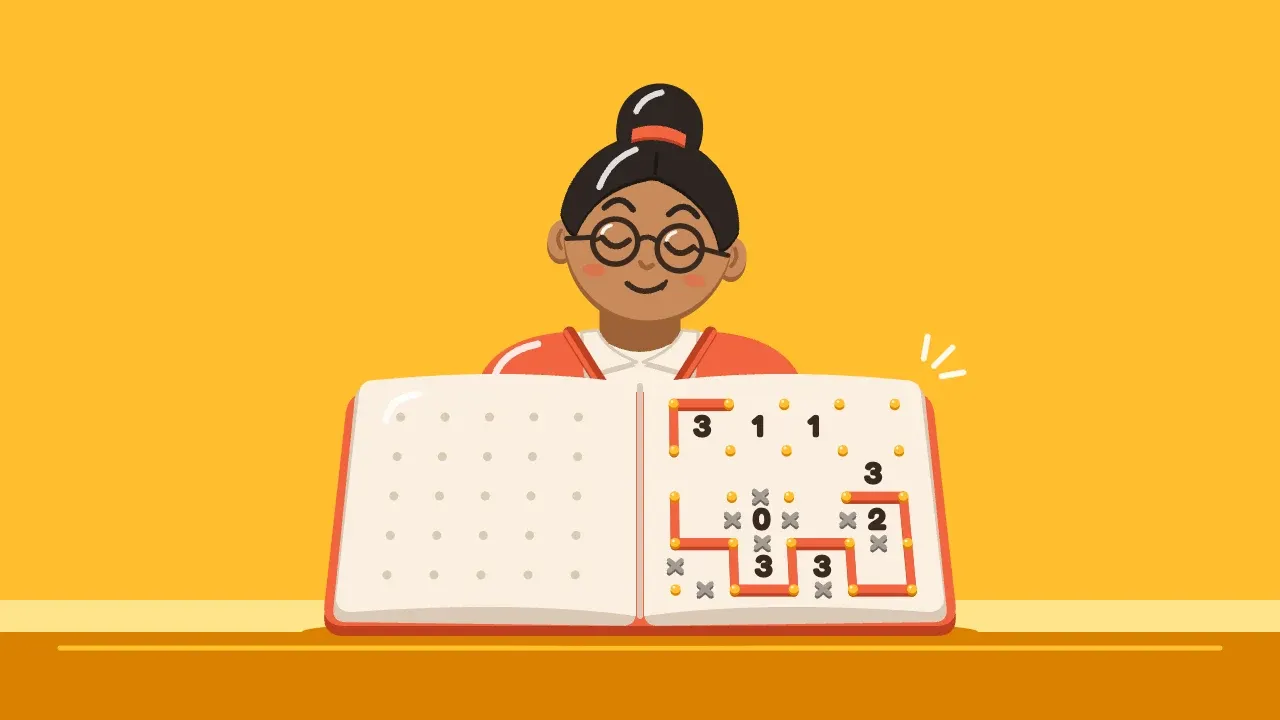
Here’s how to solve Slitherlink: you draw one closed loop along the lines between dots, and each number tells you how many sides of its square the loop uses. It’s a logic puzzle, and a well-made grid has one solution you can reach by logic, without guessing.
The rules come first, then six moves to look for first. After that, the reasoning for when those run out, and a small 4x4 puzzle solved from blank to loop.
The rules in one minute
Slitherlink is played on a rectangular grid of dots. According to Nikoli, you connect neighbouring dots with horizontal and vertical lines to make a single loop, and that loop can’t cross itself or branch.
Numbers sit inside some of the squares. A number says how many of that square’s four sides are part of the loop, and an empty square can have any number of lines around it, as Krazydad puts it. The numbers are 0, 1, 2 or 3 (Nikoli’s page lists these four). So a 0 has no sides in the loop, a 2 has exactly two, and a 3 has three of its four.
There’s one more rule hiding in the others. BrainBashers points out that each dot has either zero or two lines through it. That’s why the loop can’t cross or touch itself: a crossing or a touch would put three or four lines on one dot. It’s also why the loop has no dead ends. Any line that gets to a dot has to leave again.
Slitherlink comes from Japan. Nikoli first published it in 1989, according to Grandmaster Puzzles, in its quarterly Communication 26. That same page says the first puzzles had a number in every square, and the layout was soon made sparser. Nikoli’s own page calls Slitherlink an original puzzle it’s proud of. You’ll also meet it under other names, such as Loop the Loop, Fences, Dotty Dilemma and Loopy (Wikipedia lists several).
Before you start: mark lines and “no lines”
Mark two things, not one. Draw a line on every edge you’re sure about, and put a small x on every edge the loop can’t use. Puzzle Magazine suggests marking lines clearly, adding a small x where the loop doesn’t go, and putting a light line through squares whose number is already met.
The crosses matter as much as the lines. A cross stops you drawing there by accident, and it makes dead ends easy to see. What’s a dead end? A dot where a line arrives and has no way to carry on. Every dot ends with zero or two lines, so a dot that’s got one line and no free edge left means a mark is wrong somewhere.
Use a pencil and an eraser on paper, or a digital version with an undo button. You’ll change your mind now and then. That’s normal.
6 starting moves to learn first
Scan the grid for these patterns before anything else. Between them, the guides from Puzzle Magazine and BrainBashers list all six. In the pictures below, + is a dot, a drawn line is --- or |, and x is an edge crossed out.
1. A 0: cross out all four sides
No side of a 0 touches the loop, so every edge around it gets an x. It’s the easiest move there is.
+ x +
x 0 x
+ x +
2. A 3 in a corner: draw its two outer sides
Both outer sides of a corner 3 are lines. The corner dot has only two edges, and if the loop skipped them, the 3 would have just two sides left to use.
+---+   +
| 3
+   +   +
3. A 3 next to a 0: draw the three sides not shared with the 0
It works the same way whether the 0 is beside the 3 or above or below it: the 0 leaves the edge between the two squares empty, so the 3 has to use its other three sides.
+---+ x +
| 3 x 0 x
+---+ x +
4. Two 3s side by side: draw the shared side and the two end sides
Draw the side the two 3s share, plus the side beyond each 3 in line with the pair: three lines in all. For two 3s next to each other in a row, that’s a left side, a middle side and a right side. The other sides of each 3 aren’t forced yet, so leave them.
+   +   +
| 3 | 3 |
+   +   +
5. A 1 in a corner: cross out both outer sides
The two sides that meet at the corner dot can’t be lines. If just one were drawn, the corner dot would be a dead end, and if both were drawn, the 1 would be a 2.
+ x +   +
x 1
+   +   +
6. A 2 diagonal to a 3: the 2’s corner sides can’t both be lines
This one forces no line by itself. It’s a “not both” rule, but it’s a useful one. Take a 2 and a 3 that touch at a corner dot. The two sides of the 2 that meet at that dot can’t both be lines, because that’d use up the dot’s two lines and leave the 3 with only two sides.
+   +   +
  2
+   +   +
      3
+   +   +
In the picture, the 2’s right side and bottom side can’t both be drawn. So at least one of the 2’s other sides, the top or the left, is a line. Pencil in a small note and come back to it when a neighbouring square gives you more.
When the numbers run out: reason about the loop
Nothing left from the starting patterns? Switch from the numbers to the dots. Three rules help here:
- A dot with two lines is finished. Cross out every other edge at that dot.
- A dot with one line needs a way out. If only one free edge is left, draw it. If there’s none left, an earlier mark was wrong.
- Don’t close a small loop early. If a line would close the loop while some squares still need lines, cross that edge out.
BrainBashers also crosses out a line that would create a loop that isn’t allowed, and Puzzle Magazine says two small ends of the loop can’t join up and cut themselves off from the rest.
The numbers help in the same way. Once a square has all the lines its number asks for, cross out its other sides. If a square’s lines plus its still-open sides add up exactly to its number, draw every open side. The Puzzles Wiki gives the same rule for the second case.
After every mark, look at the dots it touches, then at the squares it touches. A new line can finish a dot, and a finished dot can finish a square.
A small grid solved step by step
Here’s a 4x4 puzzle, which has 5x5 dots. Among all 9,349 loops that fit a 4x4 grid, exactly one matches these clues, checked by script. A blank square has no clue.
+   +   +   +   +
  3   1   1
+   +   +   +   +
              3
+   +   +   +   +
      0       2
+   +   +   +   +
      3   3
+   +   +   +   +
Squares are named by row and column from the top left, so the 0 is in row 3, column 2.
Step 1: cross out the 0. All four of its sides get an x.
Step 2: draw the corner 3’s outer sides. That’s its top and its left side, from move 2.
Step 3: finish the 3 under the 0. The 0 already crosses this 3’s top side, so the other three sides are lines (move 3).
+---+   +   +   +
| 3   1   1
+   +   +   +   +
              3
+   + x +   +   +
    x 0 x     2
+   + x +   +   +
    | 3 | 3
+   +---+   +   +
Step 4: let the dots do the work. Several dots around the pair of bottom 3s now have an obvious next edge.
- The dot at the top left of the left 3 has its top and right sides crossed and a line below it, so the loop’s got to go left. Draw that edge.
- The dot at the top left of the right 3 has the same story: up and left are crossed, and the shared side leaves it downward. Draw the edge to its right, which is the right 3’s top side.
- The dot between the two 3s at the bottom already has two lines, so the right 3’s bottom side is crossed. The right 3 already has its top and left sides, so its third line is its right side. The left side, the shared side and the right side of the pair are all lines: move 4 at work.
The bottom-left dot is finished too, so cross out the edge to its left. That leaves the corner dot with a single free edge, a dead end, so cross out the edge going up the left side as well.
Step 5: follow the right edge and the left edge. The right 3’s right side runs down into the bottom right, where the loop has to turn along the bottom and then up the right edge. The dot at the top right of the right 3 now has two lines, so cross out its other edges. That leaves the 2 in row 3, column 4 with only two usable sides, so its top and right are lines.
On the left, the dot at the end of the new left line needs one more way out. Only up is free, so draw it.
+---+   +   +   +
| 3   1   1
+   +   +   +   +
              3
+   + x +   +---+
|   x 0 x   x 2 |
+---+ x +---+ x +
x   | 3 | 3 |   |
+ x +---+ x +---+
Step 6: run along the top row. The dot at the bottom right of the 3 in row 2, column 4 already has two lines, so that 3’s right side is crossed and its other three sides are lines. The loop then has to go up the right edge and along the top, and that fills in the top row. Each 1 gets its single line on top, and the crosses go on its other sides.
Step 7: close the loop. Back at the corner 3, its right side is crossed, so its third line is its bottom. Each dot along the way then has only one exit, and two more lines close the loop. Every number matches, so the puzzle is solved.
Show the solved grid
+---+---+---+---+
| 3 x 1 x 1 x   |
+---+ x + x +---+
x   |       | 3 x
+---+ x + x +---+
|   x 0 x   x 2 |
+---+ x +---+ x +
x   | 3 | 3 |   |
+ x +---+ x +---+
What did each step use? A pattern from the six moves, or a dot with two lines, or a dot with one way out. You didn’t have to try a line to see what would happen.
Common mistakes
- Forgetting the crosses. If you only draw lines, you lose half of what you know. Fix: whenever a number is met or a dot is full, cross out the rest right away.
- Closing a small loop early. A neat little loop feels like progress, but it’s wrong while other squares still need lines. Fix: before joining two loose ends, check that you wouldn’t be making a separate closed circle.
- Counting a number’s sides twice. A square’s side is shared with its neighbour, so a line on it counts for both squares. Fix: when you draw a line, check the clue on each side of it.
- Guessing when a deduction was available. A guess hides the real move and makes a mistake hard to find. Fix: stop, scan the 0s, the 3s and the dots that have two lines, then look again.
Where to practise
The habits here are the same ones that work on other logic puzzles: find what’s forced and mark it, then look again. If you liked this, read how to solve nonograms or Kakuro, which run on the same approach with different rules. The habits that help with any logic puzzle carry over too, and types of puzzle games lists the main kinds of puzzle game, logic puzzles among them.
For real Slitherlink, Krazydad offers printable puzzles in 7x7, 10x10 and 20x20 grids, each in Easy, Intermediate and Tough. Simon Tatham’s free puzzle collection has Loopy, which runs in the browser, and its manual credits Nikoli for the basic idea.
Want something to play right here? Try Loopaway, a free arrow puzzle in your browser. It isn’t a loop puzzle, but the habit is the same. How arrow puzzles work explains the board, and there’s more to pick from in the free puzzle games.
Frequently asked questions
What are the rules of Slitherlink?
Draw lines between neighbouring dots to make one closed loop that never crosses or branches. Each number says how many of its square's four sides the loop uses, and squares without a number have no limit.
Where do you start in a Slitherlink puzzle?
Scan for 0s first, then 3s in corners, a 3 next to a 0, and two 3s side by side. Each of these gives you lines or crosses before you need any deeper reasoning.
What does a 3 in the corner mean in Slitherlink?
Both outer sides of that square are lines. The corner dot has only two edges, and if the loop skipped them, the 3 would have only two sides left.
Can a Slitherlink loop cross or touch itself?
No. The loop never crosses itself, and every dot has either zero or two lines through it, so two parts of the loop can't meet at a dot. Two stretches can still run side by side without touching.
Is Slitherlink always solvable without guessing?
Well-made puzzles are. Grandmaster Puzzles asks for a unique solution reachable by logic alone, and Krazydad says you can find its solution without guessing, but don't assume that of every puzzle on every site.
Sources
- Slitherlink - nikoli
- Slitherlink Rules and Info - The Art of Puzzles (Grandmaster Puzzles)
- Slitherlink (Wikipedia)
- Slitherlink Solving Strategies (Puzzle Magazine)
- Help - Slitherlink (BrainBashers)
- Slitherlink (Loop the Loop) – Free Printable Puzzles (krazydad)
- Simon Tatham's Portable Puzzle Collection
- Loopy, chapter 23 of the puzzle collection manual
- Slitherlink (Puzzles Wiki)